Blade Selection
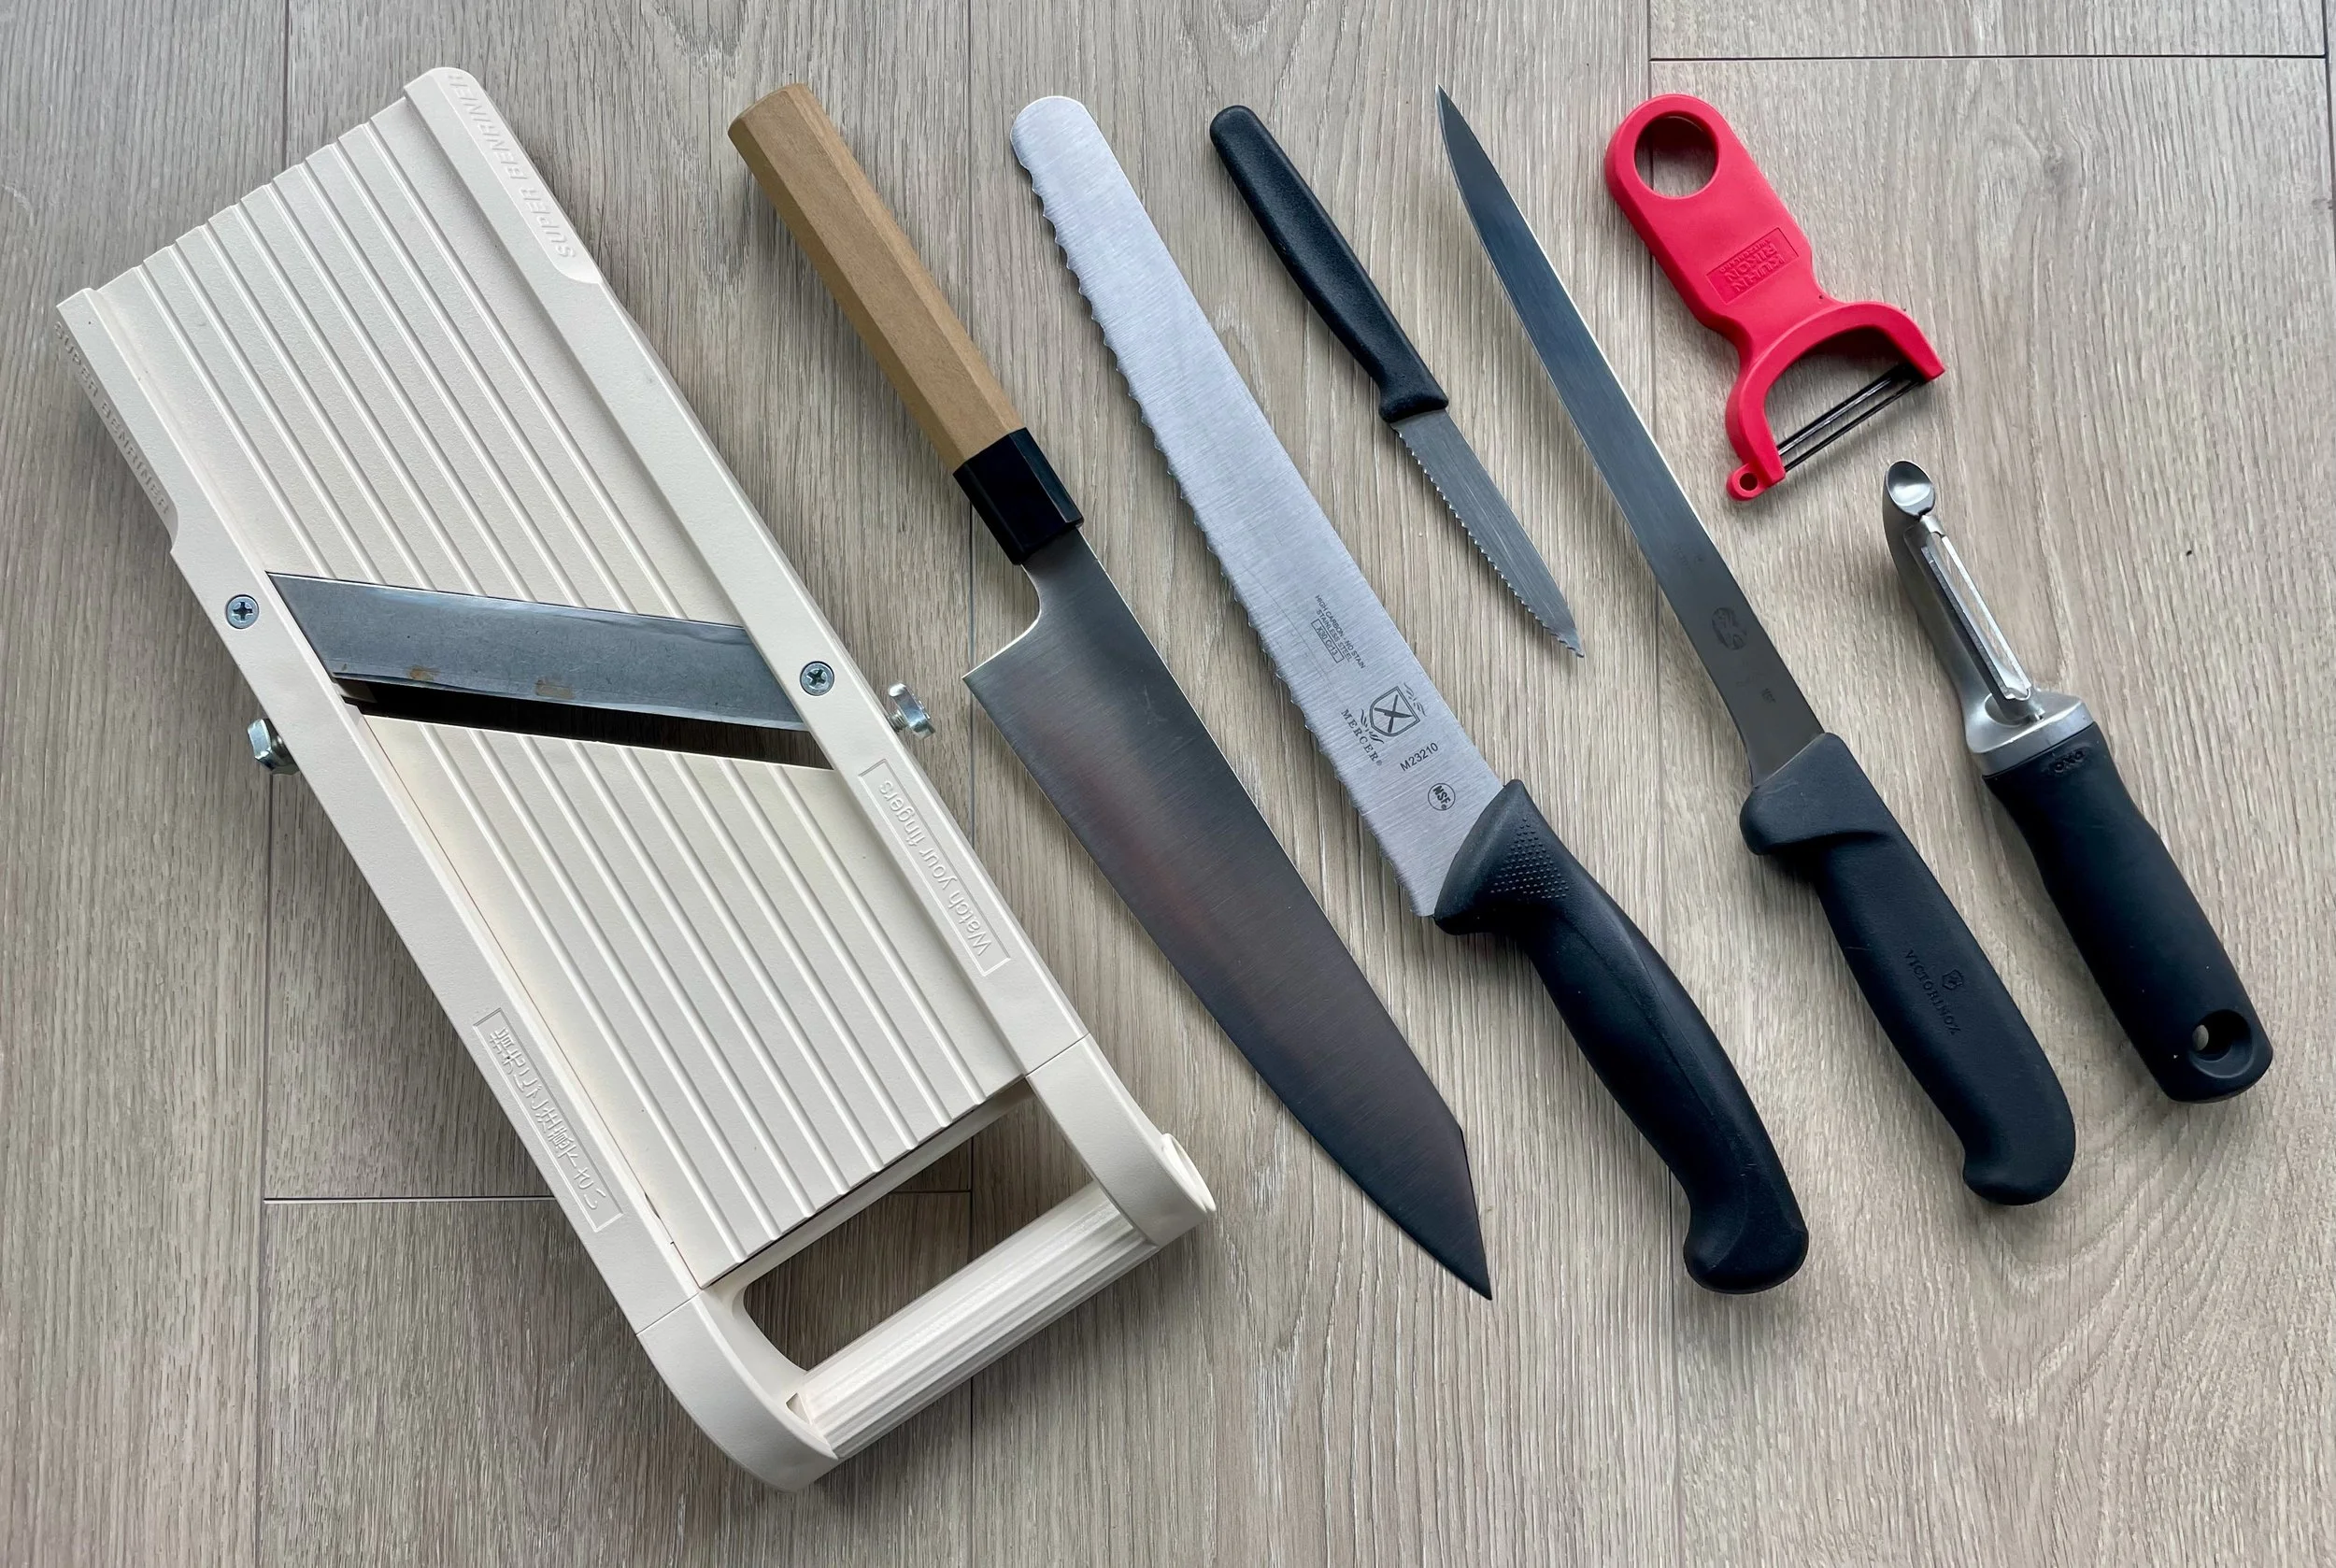
Every blade in my chef knife roll has a job. Pull the wrong one and the cut still gets made. It just gets made slow, ugly, or with a trip to the first aid kit or worse (ask Jeremy Clarkson).
The fireground works the same way. Hydraulic ventilation, an attack line fogging smoke out the window from inside the fire room, and positive pressure ventilation, an electric fan blowing in at the front door, both clear a building. Neither one is right for every fire. You read the conditions, then you pick the tactic. Cutting is no different. Here's the assignment sheet I run before I ever pull a blade.
THE REPORT
CHEF'S KNIFE — First-due engine. Rolls on everything, handles most of it.
BREAD KNIFE — First-due truck. For when you need to bite through something hard to reach something soft.
BONING KNIFE — First-due Heavy Rescue or Squad. Gets the protein out clean without damaging what's around it.
PARING KNIFE — Close quarters fire attack. Small targets, tight spaces, work done in the hand.
VEGETABLE PEELER — Overhaul. Strips what doesn't belong, saves what does.
MANDOLINE — Specialty unit, think Haz-Mat. Ordered and precise, with zero tolerance for freelancing.
CHEF SCISSORS — The subject matter expert. Not first-due, but should show up on more calls than you'd think.
SIZE-UP: KNOW THE JOB BEFORE PULLING A BLADE
Before any blade touches food, read three things: what's on the board, what it needs to become, and what you're cutting on. A crusty loaf, a whole chicken, and forty potato slices for a gratin are three different calls. And no tool works off a cutting board that slides every time you push.
Response: Lock the board down with a damp paper towel or a non-slip mat underneath. Look at the product, decide the finished cut, then pull the tool built for that cut. Hone your edges before the shift, not halfway through it. A dull blade needs more force, and more force is how the blade ends up somewhere you didn't plan.
Tools: Wood or Composite Cutting Board, Non-Slip Board Mat, and Honing Rod
CHEF'S KNIFE: THE WORKHORSE
Symptom: A board full of onions, peppers, carrots, herbs, or boneless protein that needs to get smaller.
Risk: Reaching for anything smaller or more specialized turns a ten-minute prep into a thirty-minute one.
Response: This is your first-due engine. An 8- to 10-inch blade with a curved belly lets you rock tip to heel and mince without lifting the point. The wide blade clears your knuckles and doubles as a scraper to move product to the pan. Pinch the blade just ahead of the handle instead of fisting it. Curl the fingertips of your guide hand under and let your knuckles set the cut width. Push or rock through. If you're pressing straight down, the edge is dull.
Tools: 8-inch Chef's Knife
BREAD KNIFE: FORCIBLE ENTRY
Symptom: A hard exterior over a soft interior. Crusty sourdough, a ripe tomato, a peach, a cake layer you need to split.
Risk: A straight edge pressed into a hard crust crushes everything behind it. Or it skates off the surface and keeps going.
Response: This is your first-due truck. Long serrations act like a row of small points. They grab the surface and saw through instead of pushing down, so the soft interior keeps its shape. Use the full length of the blade with long, light strokes. Let the teeth work. Don't lean on it. Serrations don't go on a whetstone; a ceramic rod or a sharpening service handles them, or replace an inexpensive one every few years.
Tools: 10-inch Serrated Bread Knife
BONING KNIFE: EXTRICATION
Symptom: Protein that needs to come off a bone or out from under silverskin and fat. A whole chicken, a pork shoulder, a beef tenderloin, a fish fillet.
Risk: A wide chef's knife drags and tears, leaves meat on the bone, and takes good protein out with the trim.
Response: This is your first-due heavy rescue or squad. A narrow 5- to 7-inch blade with a sharp point slides along bone and joint lines instead of tearing through them. A flexible blade follows the curve of a bone or a fish's skin; a stiffer blade gives more control on beef and pork. Keep the blade flat against the bone and take short strokes. Use the tip to find joints: wiggle the leg, find where it moves, cut there. For silverskin, slide the tip under, angle the edge up toward the membrane, and pull the membrane taut. Wipe your hand and the handle often. A wet grip is a slip waiting to happen.
Tools: 6-inch Boning Knife
PARING KNIFE: CLOSE QUARTERS
Symptom: Small, detailed work that happens in your hand instead of on the board. Hulling strawberries, coring tomatoes and apples, deveining shrimp, scoring a ham, trimming a shallot.
Risk: A full-size knife in tight quarters means poor control and a blade that's too long for where your fingers are.
Response: This is your engine crew making a hallway push towards the fire room. A 3- to 4-inch blade puts your hand right on top of the work, so you steer the cut with your fingers instead of your arm. For in-hand cuts, brace your thumb on the product below the cutting line and draw the blade toward it slowly. For coring, angle the tip in and turn the fruit, not the knife. Once the job outgrows your hand, move it to the board and call in the chef's knife.
Tools: 3.5-inch Paring Knife
VEGETABLE PEELER: OVERHAUL
Symptom: Skins that need to come off fast. Potatoes, carrots, cucumbers, apples, ginger.
Risk: Peeling with a knife takes twice as long and throws away a layer of good product with every pass.
Response: This is your on-deck crew ready to be assigned to salvage and overhaul, ready to peel siding and burnt wood to expose the cause and origin of the fire. A fixed guard sets the depth, so the blade takes the skin and nothing else. The swivel peeler handles long, narrow produce; the Y-peeler works side to side and handles big, round produce better. Peel away from your body or across the work in long, steady strokes. Brace large items against the board instead of your palm. It also makes zucchini ribbons and shaves Parmesan. When it starts skipping or tearing, replace it. Peelers are cheap. Your time isn't.
Tools: Y-Peeler and Swivel Peeler
MANDOLINE: SPECIALTY UNIT
Symptom: A big batch of identical, thin cuts. Potato gratin, homemade chips, shaved fennel or cabbage for slaw, cucumber and radish for salads.
Risk: By knife, forty even slices take forever and still come out uneven, which means uneven cooking. On the mandoline itself, skipping the guard is the fastest way to a laceration in the kitchen.
Response: Think Haz-Mat, a specialty unit. A fixed blade at an adjustable height gives you the same thickness every pass, down to paper-thin. Swap in a julienne insert for matchsticks. PPE is not optional: use the hand guard, wear a cut-resistant glove, or both. Set it on a damp towel so it can't walk. Use steady, even strokes, and don't force dense product. Stop before the last inch. That heel isn't worth a fingertip; finish it with the chef's knife or save it for stock. Rushed or distracted? Leave this one in the drawer.
Tools: Adjustable Mandoline Slicer and Cut-Resistant Gloves
CHEF SCISSORS: A subject matter expert
Symptom: Jobs that need leverage or a quick snip more than a slice. Spatchcocking a chicken, trimming fat, snipping herbs straight into the pot, cutting bacon into lardons, breaking down dried chiles.
Risk: Forcing a knife through a chicken backbone takes real downward pressure on a round, slippery target. That's how a blade rolls and finds your hand.
Response: Think trauma shears. Every medic carries a pair because they cut through what a blade can't do safely. A well-crafted pair has heavy blades, a micro-serrated edge that grips slick protein, and a notch near the pivot for bone. Look for blades that come apart at the pivot so you can scrub them clean. Raw chicken trapped in a fixed hinge is a problem. Cut alongside the backbone, not through it, and let the handles do the work. If Alton Brown swears by them, so should you.
Tools: Take-Apart Kitchen Shears
WORKING FIRE: YOU ALREADY CUT YOURSELF
Symptom: The blade found you instead of the onion.
Risk: "If it bleeds, we can kill it" is a life lesson from Major Dutch Schaefer on avoiding cutting yourself. If you bleed during the cook, you’ve lost the meal and have to start over. But most kitchen cuts are minor. A few need more than a bandage, and waiting too long turns a quick fix into a bigger one.
Response: Stop prepping. Rinse the cut under clean running water. Hold firm, direct pressure with a clean cloth for a full 10 minutes without peeking, and raise the hand above your heart. Get it seen if the bleeding won't stop after that, the edges gap open, you see fat or deeper tissue, a finger goes numb or won't move right, or your tetanus shot is out of date. Then figure out how it happened. Usually it's a dull edge, a sliding board, or the wrong tool. Every cut is a lesson for the next shift.
THE TAKEAWAY
A chef’s knife roll isn't a collection; it's an apparatus inventory. Every unit has an assignment, and the call decides who rolls. Size up the job, pull the tool built for it, and keep every edge sharp. Stop forcing one blade to do seven jobs.